Horizontal Mohawk vs. Fan Foil Placements: When and How to Use Each Technique
By: KENRA PROFESSIONAL
When it comes to highlights, the options are endless. Is your client looking for contrast? Blended dimension? A more natural, lived-in look? Whatever their desired look is, you can make it happen.
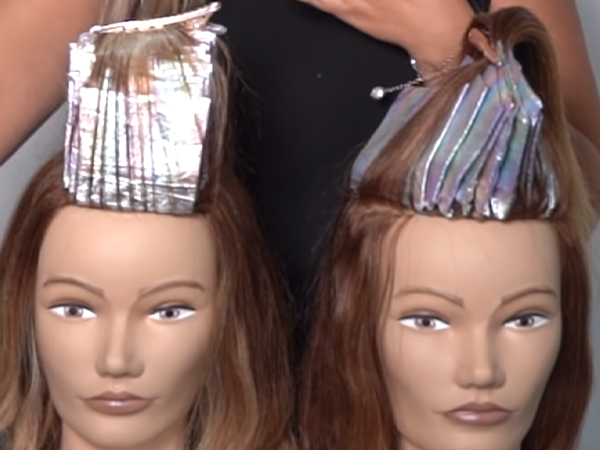
Below, Kenra Professional Brand Ambassador Lo Wheeler (@lo_wheelerdavis) demonstrates what can be achieved by using mohawk sectioning vs. a fan shaped foil placement on your client.
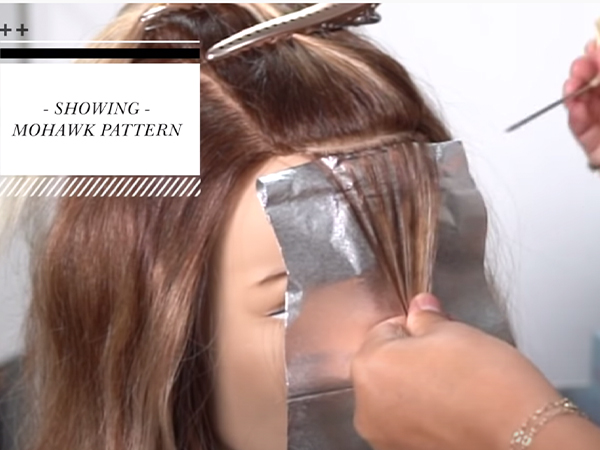
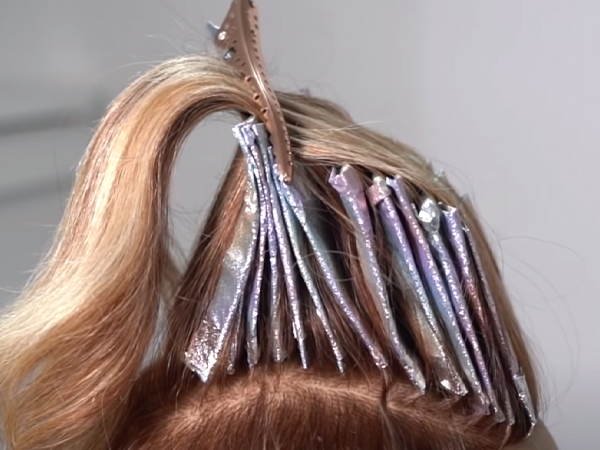
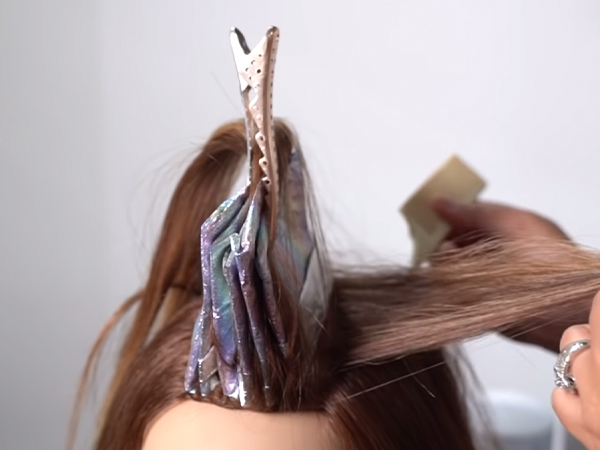
Mohawk Foil Placement is a classic approach to foiling that allows for bold, dimensional color, and is best for clients who like to change the part of their hair. In this mohawk section placement, the foils are applied horizontally and go towards the back. Starting from the front and working back will allow for the front to be lighter, specifically around the face. Once the top horseshoe section has been isolated from temple to temple, the foil work can begin.
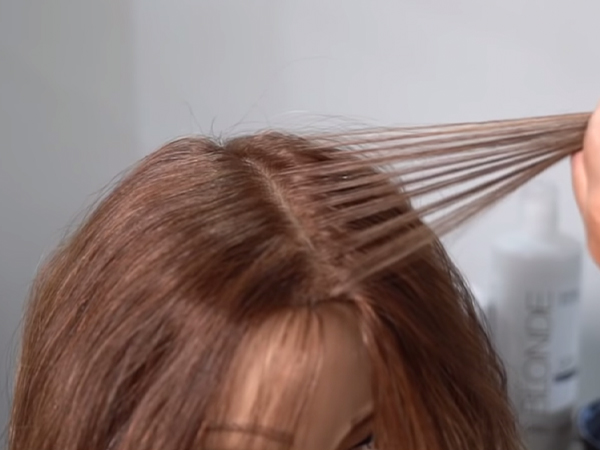
Step 1: Take a small subsection at the hairline and weave in a fine to medium pattern depending on how much dimension is desired.

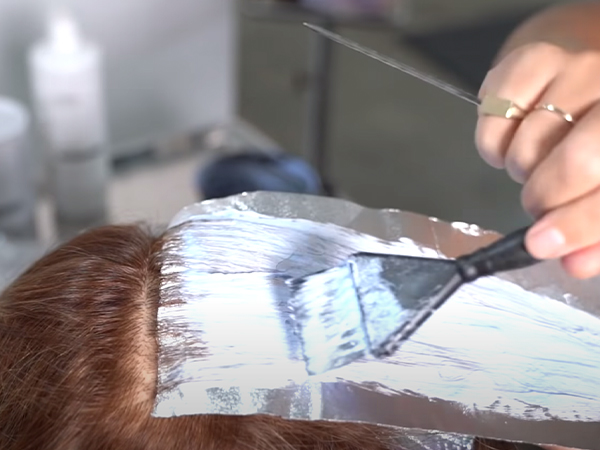
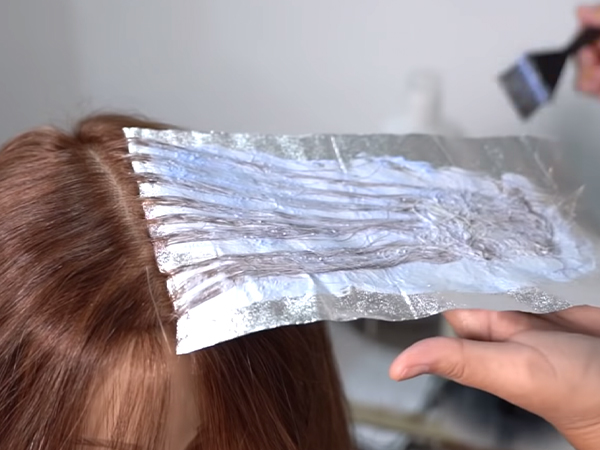
Step 2 : Apply Kenra Professional Simply Blonde Blue Powder Lightener with 20 or 30 vol at a 1:2 ratio and work from scalp to ends or until blended with previous blonding.
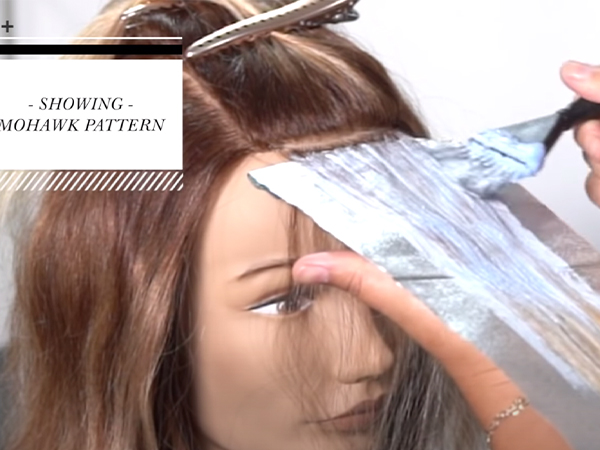
Step 3: Work in very small subsections in this area, leaving a fine amount of hair in between foils to ensure maximum brightness at the front.
Step 4: Continue working in horizontal subsections as you go toward the back to keep consistency with your placement and weave patterns.
Step 5 : Once foiling is complete, foils should be in alignment and clipped away if other foiling is needed. Moving them to the sides will allow for continuity of brightness and dimension throughout the look.
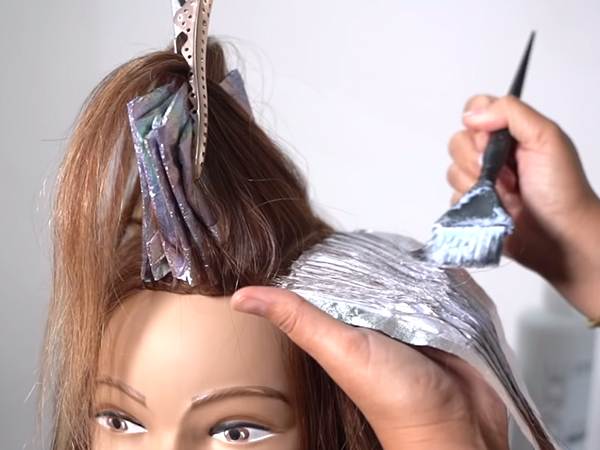
Fan-Shaped Foil Placement is a great way to add both contrast and dimension to your client’s hair. Dimension in hair is usually a blend of different colors on the head, whereas contrast speaks to the stark differences in depth and brightness next to each other.
Step 1 : Start with the same sectioning as before and work with a middle part. Apply the first foil by weaving vertically , using Simply Blonde Blue Powder Lightener with 20 or 30vol at a 1:2 ratio. Be sure to apply with lots of saturation for optimal lift and consistency.
Step 2: Work in vertical subsections on both sides of the part line until you reach the sides of the head. This application works for people who like to change their part but be strategic when applying foils on or near the part. A back-to-back foil in these areas will help with brightness.
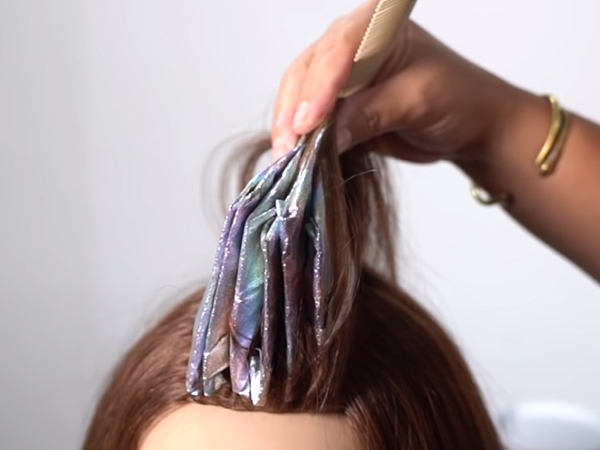
Step 3: As you work towards the temples, place the foils at a diagonal or pie shape to focus on brightness around the front and contrast towards the back. Creating space between subsections will allow for contrast between darker and lighter pieces.
Step 4: Apply two to three more foils this way on each side. Maintain the weave pattern for a cohesive and even result.
Step 5 : Place the last foils on each side at the greatest diagonal to create added contrast and bring the highlights down the sides of the head. Once the section is done, clip it away to do additional foiling.
Each application can be customized based on part, hair type and style. So, whether your client is looking for dimension, contrast, or both, achieve their desired end look
with a Mohawk or Fan Foil placement.