HOW TO: BLEACH RE-TOUCH ON CURLY HAIR
By: Kenra Professional
Global lightening, also known as a lightener or bleach retouch, can be intimidating to those who don’t have the opportunity to do it often, but with a bit of practice along with patience, it starts to come with ease. The key to this process is working quickly and efficiently in very small subsections, while paying close consideration and care to the process.
Below, Karina Hotchkiss @krina_creates lays out the steps she takes for doing such a process on naturally curly hair—complete with a few pro tips as well for a surefire success. Be sure to watch the YouTube video as a support tool to go along with these steps!
Step 1:
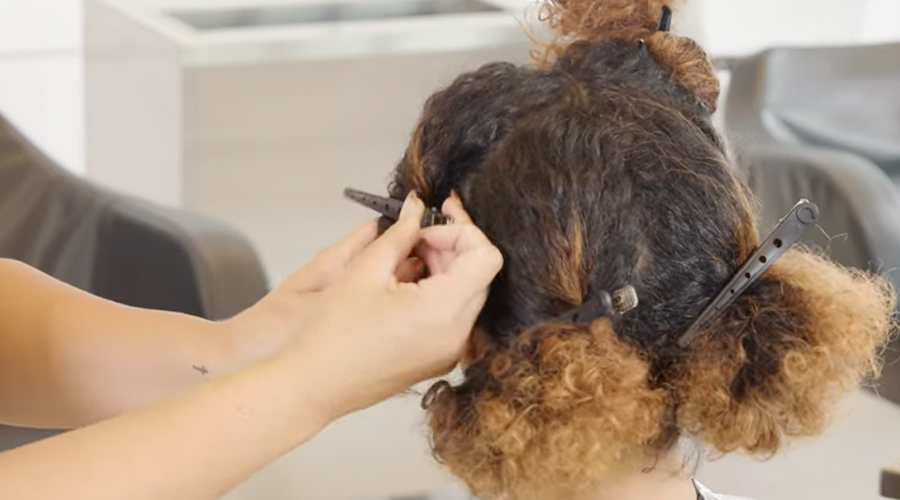
Section hair into four quadrants using fingers, create a center part beginning at the front hairline continuing into the nape. Create another parting on each side of the head starting at the apex continuing to behind each ear.
*Pro Tip - Using fingers to create sections on curly hair helps to prevent breakage and tension while sectioning.
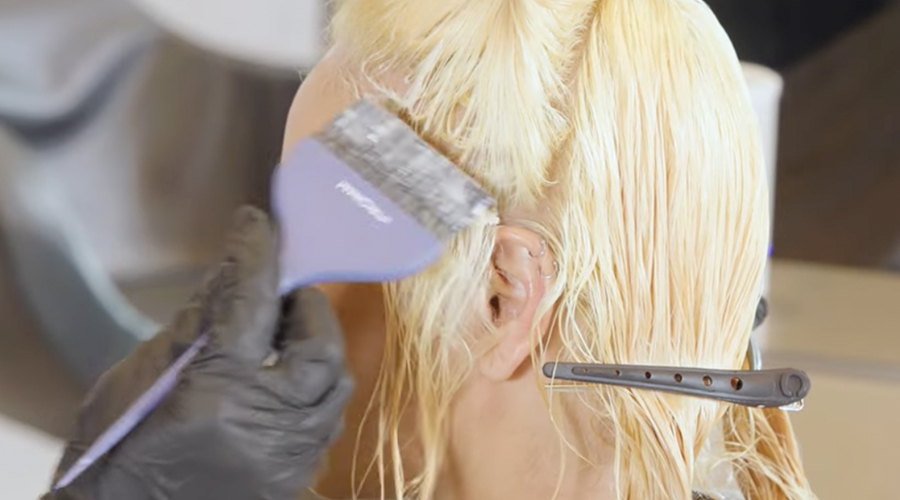
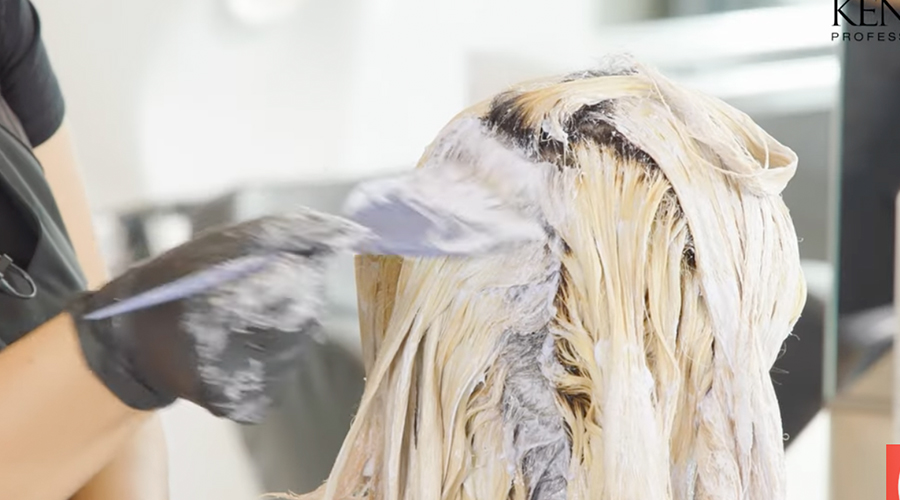
Step 2:
Starting in the back left quadrant, take ¼ inch sub-sections and begin applying Simply Blonde Beyond Bond Lightener with 20 Volume Developer ¼ inch to ½ inch from the scalp, focusing on achieving full saturation through the mid-lengths and ends. Simply Blonde Beyond Bond Lightener will help to maintain the hair’s curl pattern, thanks to its DualBond technology in the formula.
If there is previous lightener on the ends, focus solely on the mid-lengths and avoid overlap where necessary to prevent breakage. Continue this process throughout each quadrant on the head as you work through the application.
*Pro Tip - Taking thin sections will help to achieve full saturation which helps with processing time and achieving consistent, even lift. Also, using strips of cotton in between sub-sections keeps the application neat and allows for more control throughout the global lightening application.
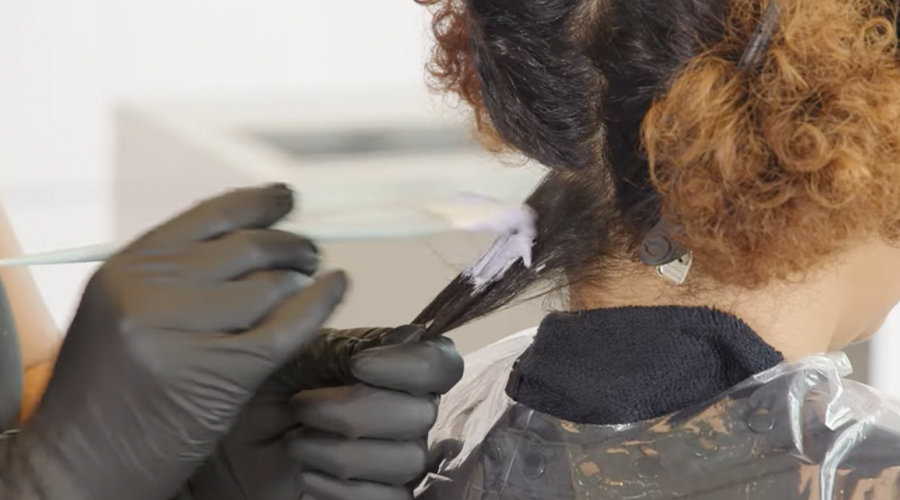
Step 3:
Begin applying lightener to the scalp starting in the back left quadrant. Continue this process through each quadrant and incubate using a plastic cap or a warm towel. Process for 20-30 minutes and check periodically as the processing time will vary depending on the hair’s texture and integrity.
*Pro Tip - Using a plastic cap or saran wrap helps keep the product moist during processing. Keeping the lightener moist during processing means the product will remain active and will allow for continued processing and lift. Do not be afraid to reapply product on areas that may have dried out during the application.
Step 4:
Once hair is processed to the desired level, shampoo the hair twice and follow up by using Porosity Equalizing Spray. Allow the Porosity Equalizing Spray to sit on the hair for at least 5 minutes and then squeeze/blot out any remaining excess before applying the toner.

Step 5:
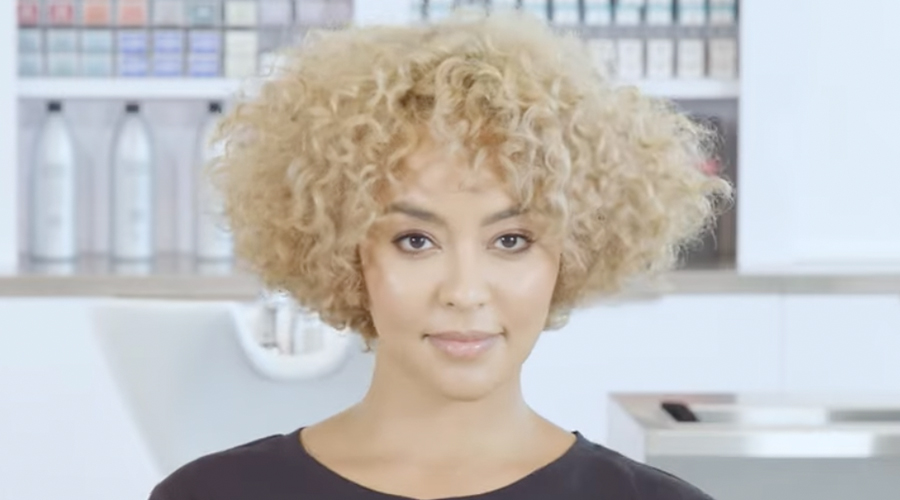
Gently section hair into four quadrants using fingers and begin applying the demi-permanent toner of your choice to thoroughly towel-dried hair. Start in the front quadrants and continue into the back quadrants and process for up to 25 minutes. Once the hair is processed, shampoo, condition, and style.
*Pro Tip - To help with curl retention and balancing the moisture levels in the hair, apply a deep conditioner such as Kenra Nourishing Masque after all color processes and prior to styling. Depending on the desired style, apply Luxe One Leave-In for gentle detangling, added nourishment and softness along with the layer and finish products of your choice.