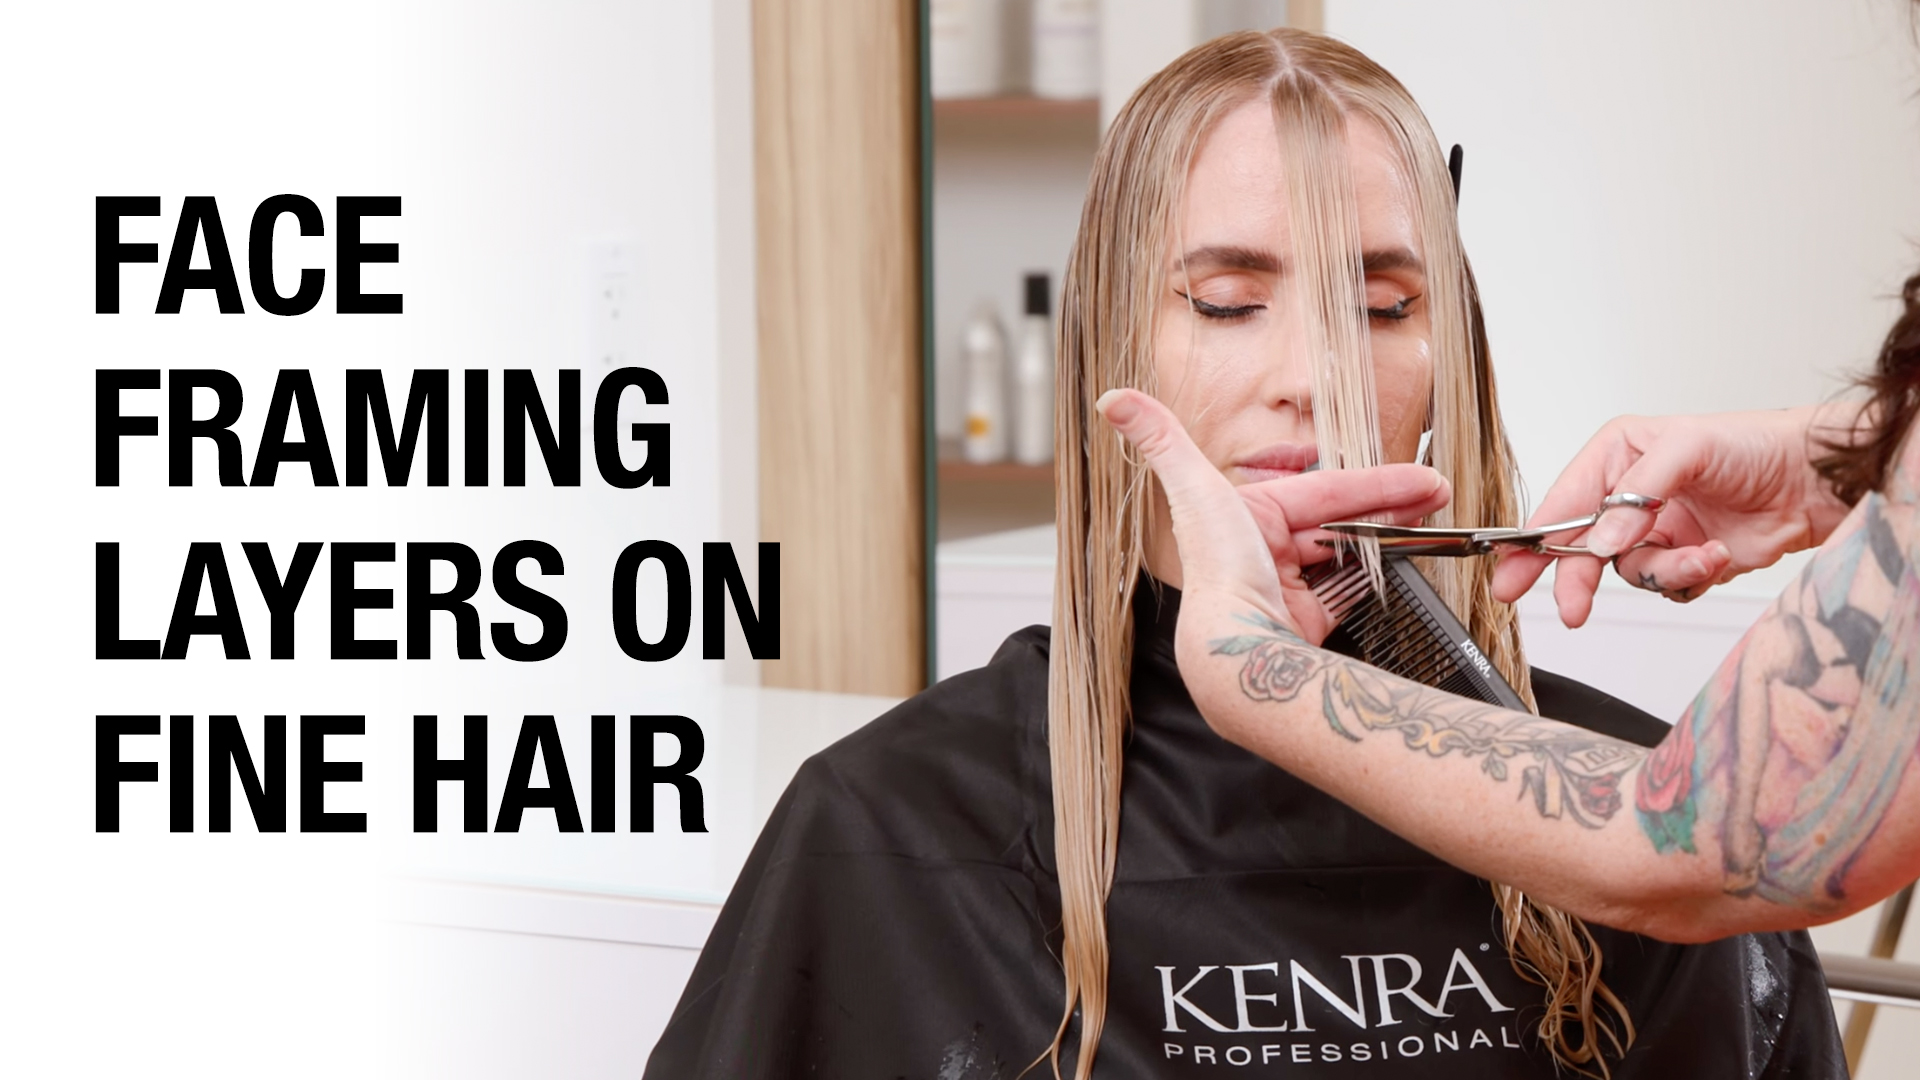
How To Cut Face-Framing Layers on Fine Hair
By: Kenra Professional
Featuring Cassi Young-Paxton @cassiyoungpaxton

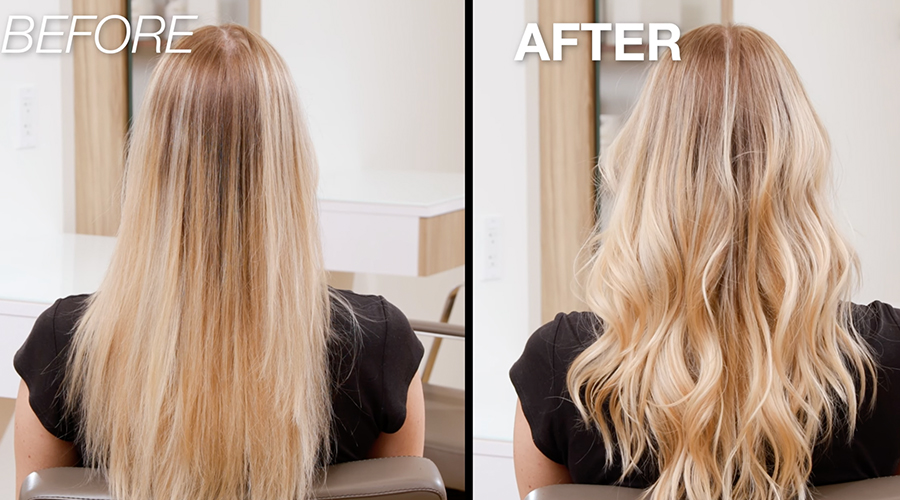
Do you have clients with fine hair who feel like their haircut needs an update, but they are concerned with losing too much length or fullness? While it may seem like the best course of action is cutting as little as possible, often adding graduation or layers to the cut can actually make their hair look even fuller! Additionally, we can complement our client's best features with a simple face framing layer or fringe.
While there are many versions and techniques on how to cut, Cassi Young-Paxton shows us her take on face-framing layers on a client looking for a fresh and eye-catching look. Below are the steps to follow along and create this style on your next guest with fine to medium hair who is wanting a new take on layers that complement their face.
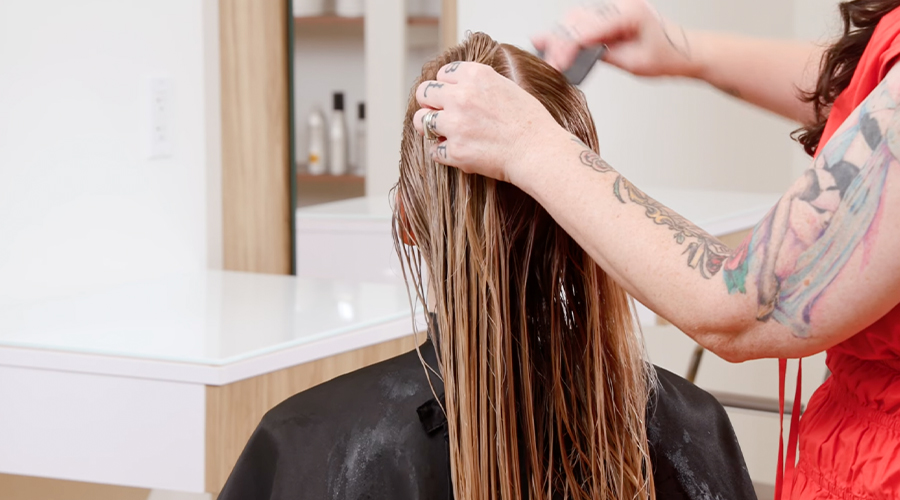
Step 1: Part the hair into a profile parting, meaning two main sections parted in half down the middle of the head, from the forehead to the nape. Cassi adds that the easiest way to manage partings is to comb it in the direction of the part, so combing it all backward can make for a quick sectioning prior to the cut.
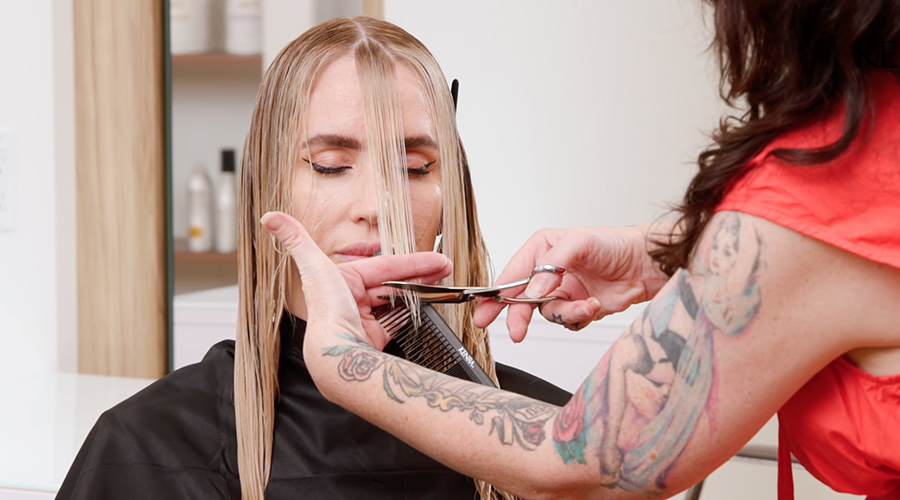
Step 2: Starting in the front, create a guideline for the frame of the face. Create the guide by cutting a small piece of hair from the fringe area at the desired length, and then work in diagonal forward subsections until you get to the recession area. At that point, the subsections should become slightly more vertical, still using the initial guide for cutting the length of the layers. Cut with your fingers pointing slightly back towards the face to preserve the length as you continue to work down the head. Whatever side you are cutting at the time, your body should be positioned on the opposite side to maintain shape and balance. Continue working until you have pulled the hair all the way from the bottom of the nape to the now-travelling guide. Depending on the placement of the initial guide and the overall length of the client’s hair, you may run out of hair to cut toward the bottom, and that is okay. Repeat this process in the opposite section on the other side of the head.
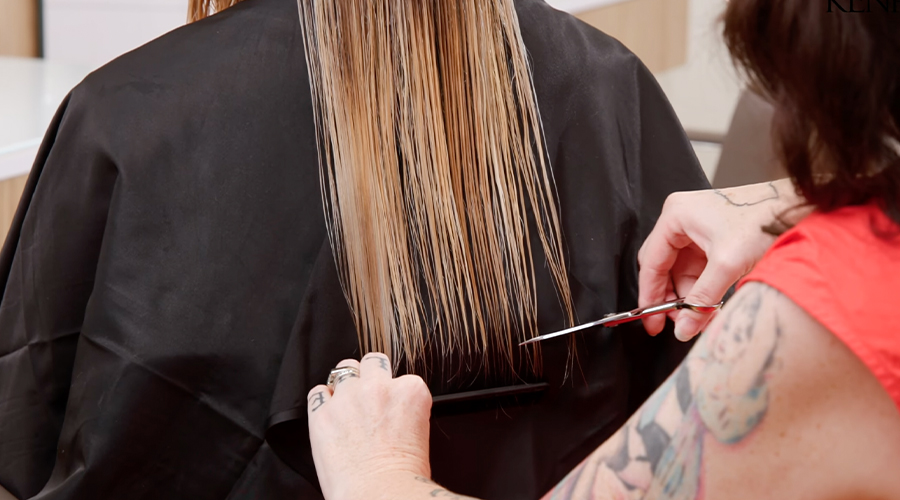
Step 3: Moving to the back and maintaining the profile parting, create a subsection in the nape area to create a strong perimeter. Cut the perimeter at the desired length and continue working up the head until there is no more hair to cut in the overall length. Work your way to each side and cut the perimeter to match the length in the back. Keep in mind that the sides will naturally and gradually get shorter towards the face due to the layers that were previously added, so it is okay if there is little to no hair to cut on the sides.
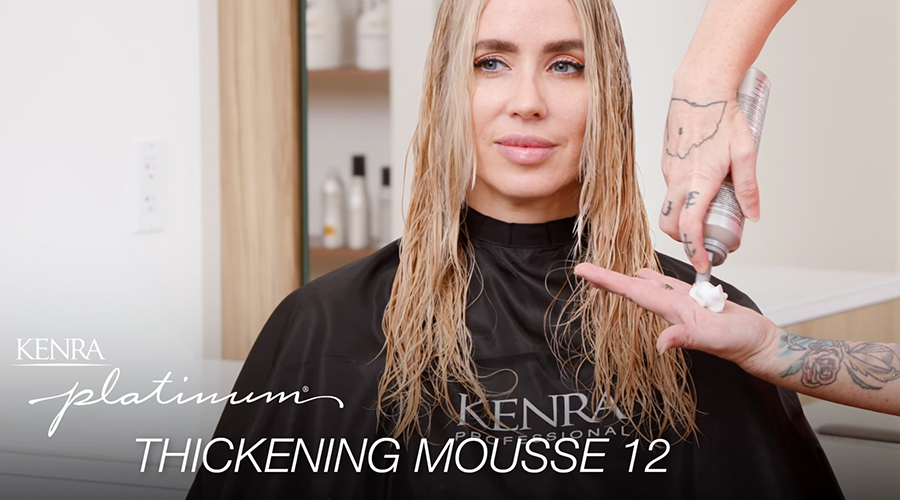
Step 4: Prep for the style by applying Kenra Platinum Thickening Mousse 12 from scalp to ends, working it throughout the hair. This will add a strong foundation for styling in the blow-dry. Layer in Luxe One Leave-In to maintain smoothness and hydration in the hair while protecting it from thermal damage. Blow-dry using fingers and removing up to 80% of the moisture prior to going back in and blow drying with a round brush.
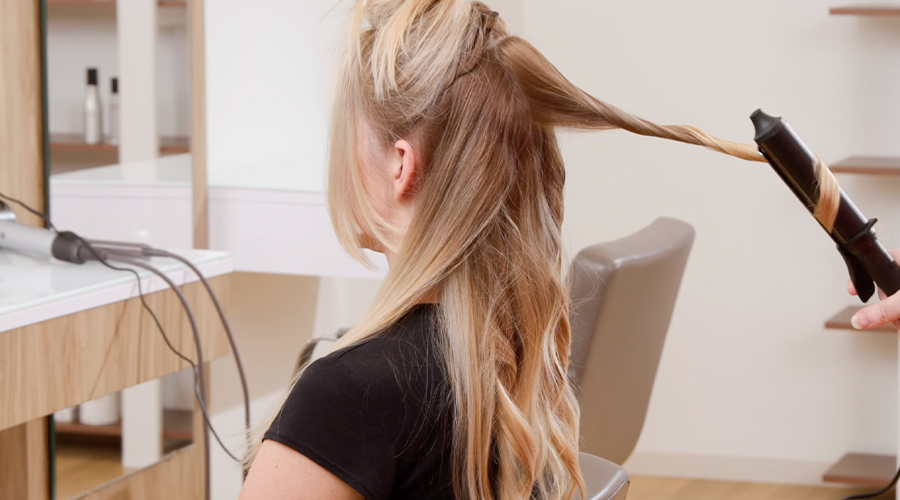
Step 5: Detail the dry haircut and perfect the look by point cutting into the layers for added movement, fullness, and texture. Focus on any areas that look like they may be heavy or need some weight removed. For added finishing, the look can be polished by curling the hair to the client’s liking. In the video below, Cassi uses a 1.5” curling iron for loose curls. Apply Kenra Dry Oil Conditioning Mist prior to styling with a hot tool to add more moisture and a beautiful shiny finish. Curl vertically and away from the face, which will add to the overall face-framing look. Finish with Kenra Perfect Medium Spray 13 for a medium hold with high shine.