

Get the Look: Expensive Brunette Technique!
By: Kenra Professional
Have you ever wondered what goes into creating a color placement from start to finish? Where does the inspiration come from? What factors are considered? What kind of planning and preparation is involved? We sat down with Victoria Cota, Artistic Brand Educator for Kenra Professional, to get key insights on a versatile look that she recently created called, “Expensive Brunette.”
What was the inspiration in creating this look?
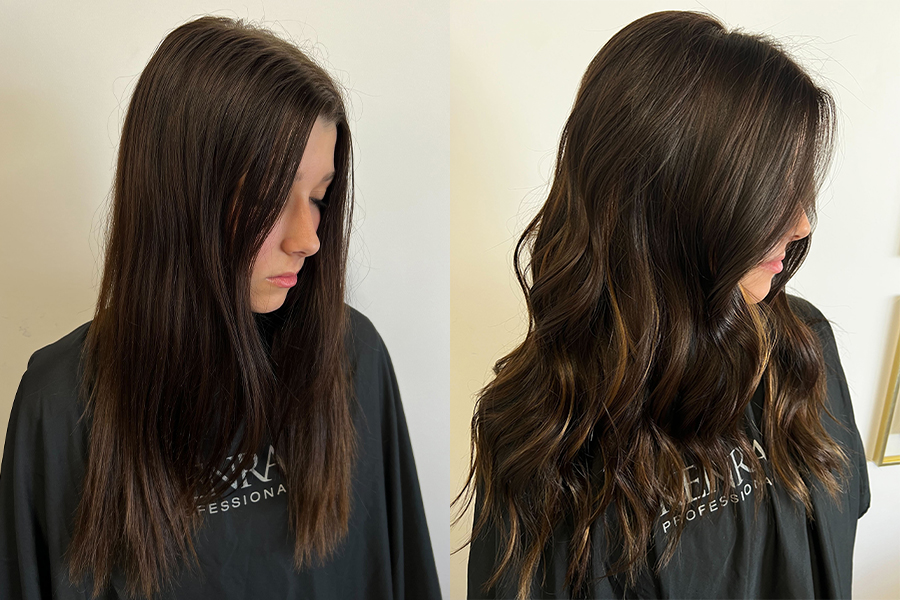
Balayage without balayage! I wanted to create a placement that gave a blended, balayaged effect but was quick and even more time efficient. I can do my base color, foils, and end color all in a single process.
How did you go about creating the technique and what was your process?
I wanted a bold, high-impact look through the interior and ends—while also soft and low maintenance at the roots. This technique creates effortlessly blended looks that my clients want but gives maximum lift and impact with minimal foiling. The triangle shape is traditional for balayage placements, but I wanted to incorporate it into a foil for better lift and incubation, especially on brunettes.
What is your favorite part about the application and why?
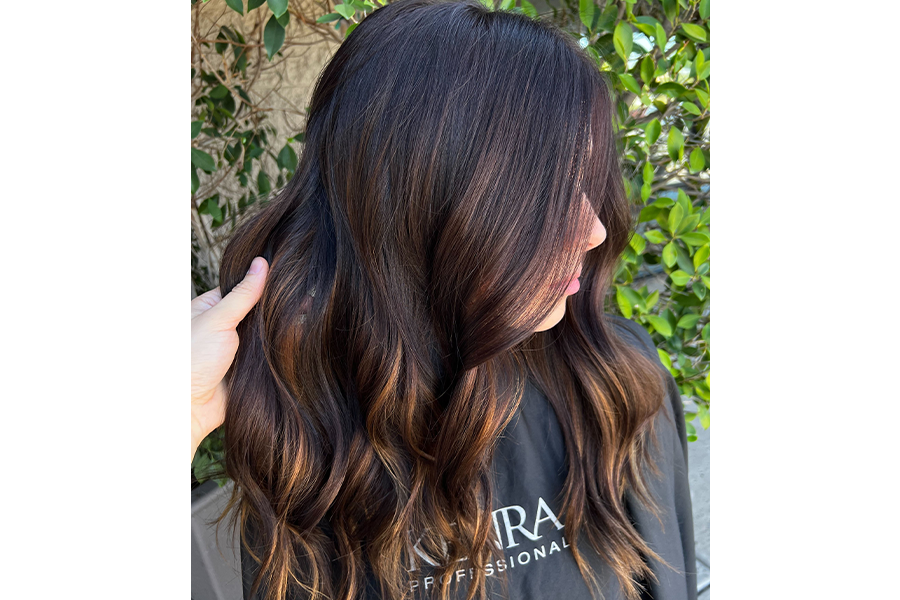
I love that I can customize for any client. It can be bright and bold or soft and diffused while utilizing any color palette—not just brunettes! I used a brick-laid triangular foil placement that provides a ribboning effect similar to balayage, but brighter and bolder. It is especially great for clients who want pops of highlights or color through the interior of their hair that can be seen whether their hair is worn straight or curly.
Are there any pro tips you would like to give to stylists who would like to try this technique?
My biggest takeaway would be that saturation is key! Make sure the foils are fully saturated while feathering the lightener at the roots for added softness and diffusion.
Here are the steps to recreate the look:
Foundation Color: 5MB+ + 5NUA (equal parts) + 20vol Anchor Color: 7MB+ + 9VM + 30vol
Accent Color: Simply Blonde Blue Powder Lightener + 20vol
Overall Glaze/Tone: 1-part 8B + 1-part 10B + 1-part 8SM + 9vol
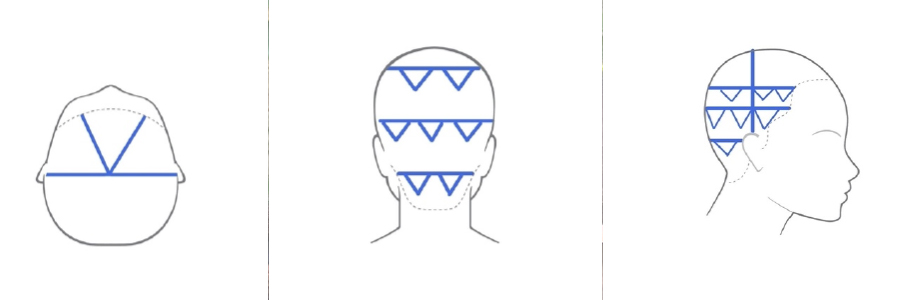
1. Part the hair into 4 sections—In the top, create a triangular, pie-shaped section from the crown to each recession. On the sides, part from the crown to behind the ears. Lastly, the back section is everything below the crown and behind the ears.
In the back section, apply the Foundation or root color at the base pulling it down 1 inch.
2. In the back 2-3” horizontal subsection, split the section in half vertically. Take a small triangular parting, melt the accent color into the Foundation color. Repeat on the other side, creating two triangular foil applications in the first subsection. Next, apply the Anchor color to all of the remaining hair in this section. Continue this triangular foil application up the head, leaving a 1-inch subsection at the top of the crown for coverage. Complete the back section by applying the Anchor to all remaining hair.
3. On the sides, apply the Foundation color at the base pulling it down 1.5 inches. Take 2-3” horizontal section and create one triangular foil using the accent color in the middle. Moving up, take another 2-3” horizontal section to create two triangular foils that brick lay with the bottom section. Apply the Anchor color to all remaining hair and repeat on the other side.
4. In the top, apply Foundation color to roots and drag the color down to desired depth. Melt the Anchor color into the Foundation.
5. Shampoo, condition, and towel dry. Apply the final glaze or toning formula of your choice all over to complete the look.
For free, live demonstrations of techniques like this and more, please visit the link below and register for the Kenra Professional virtual classes that are right for you!